Halloween Lap Quilt
- September 26, 2023
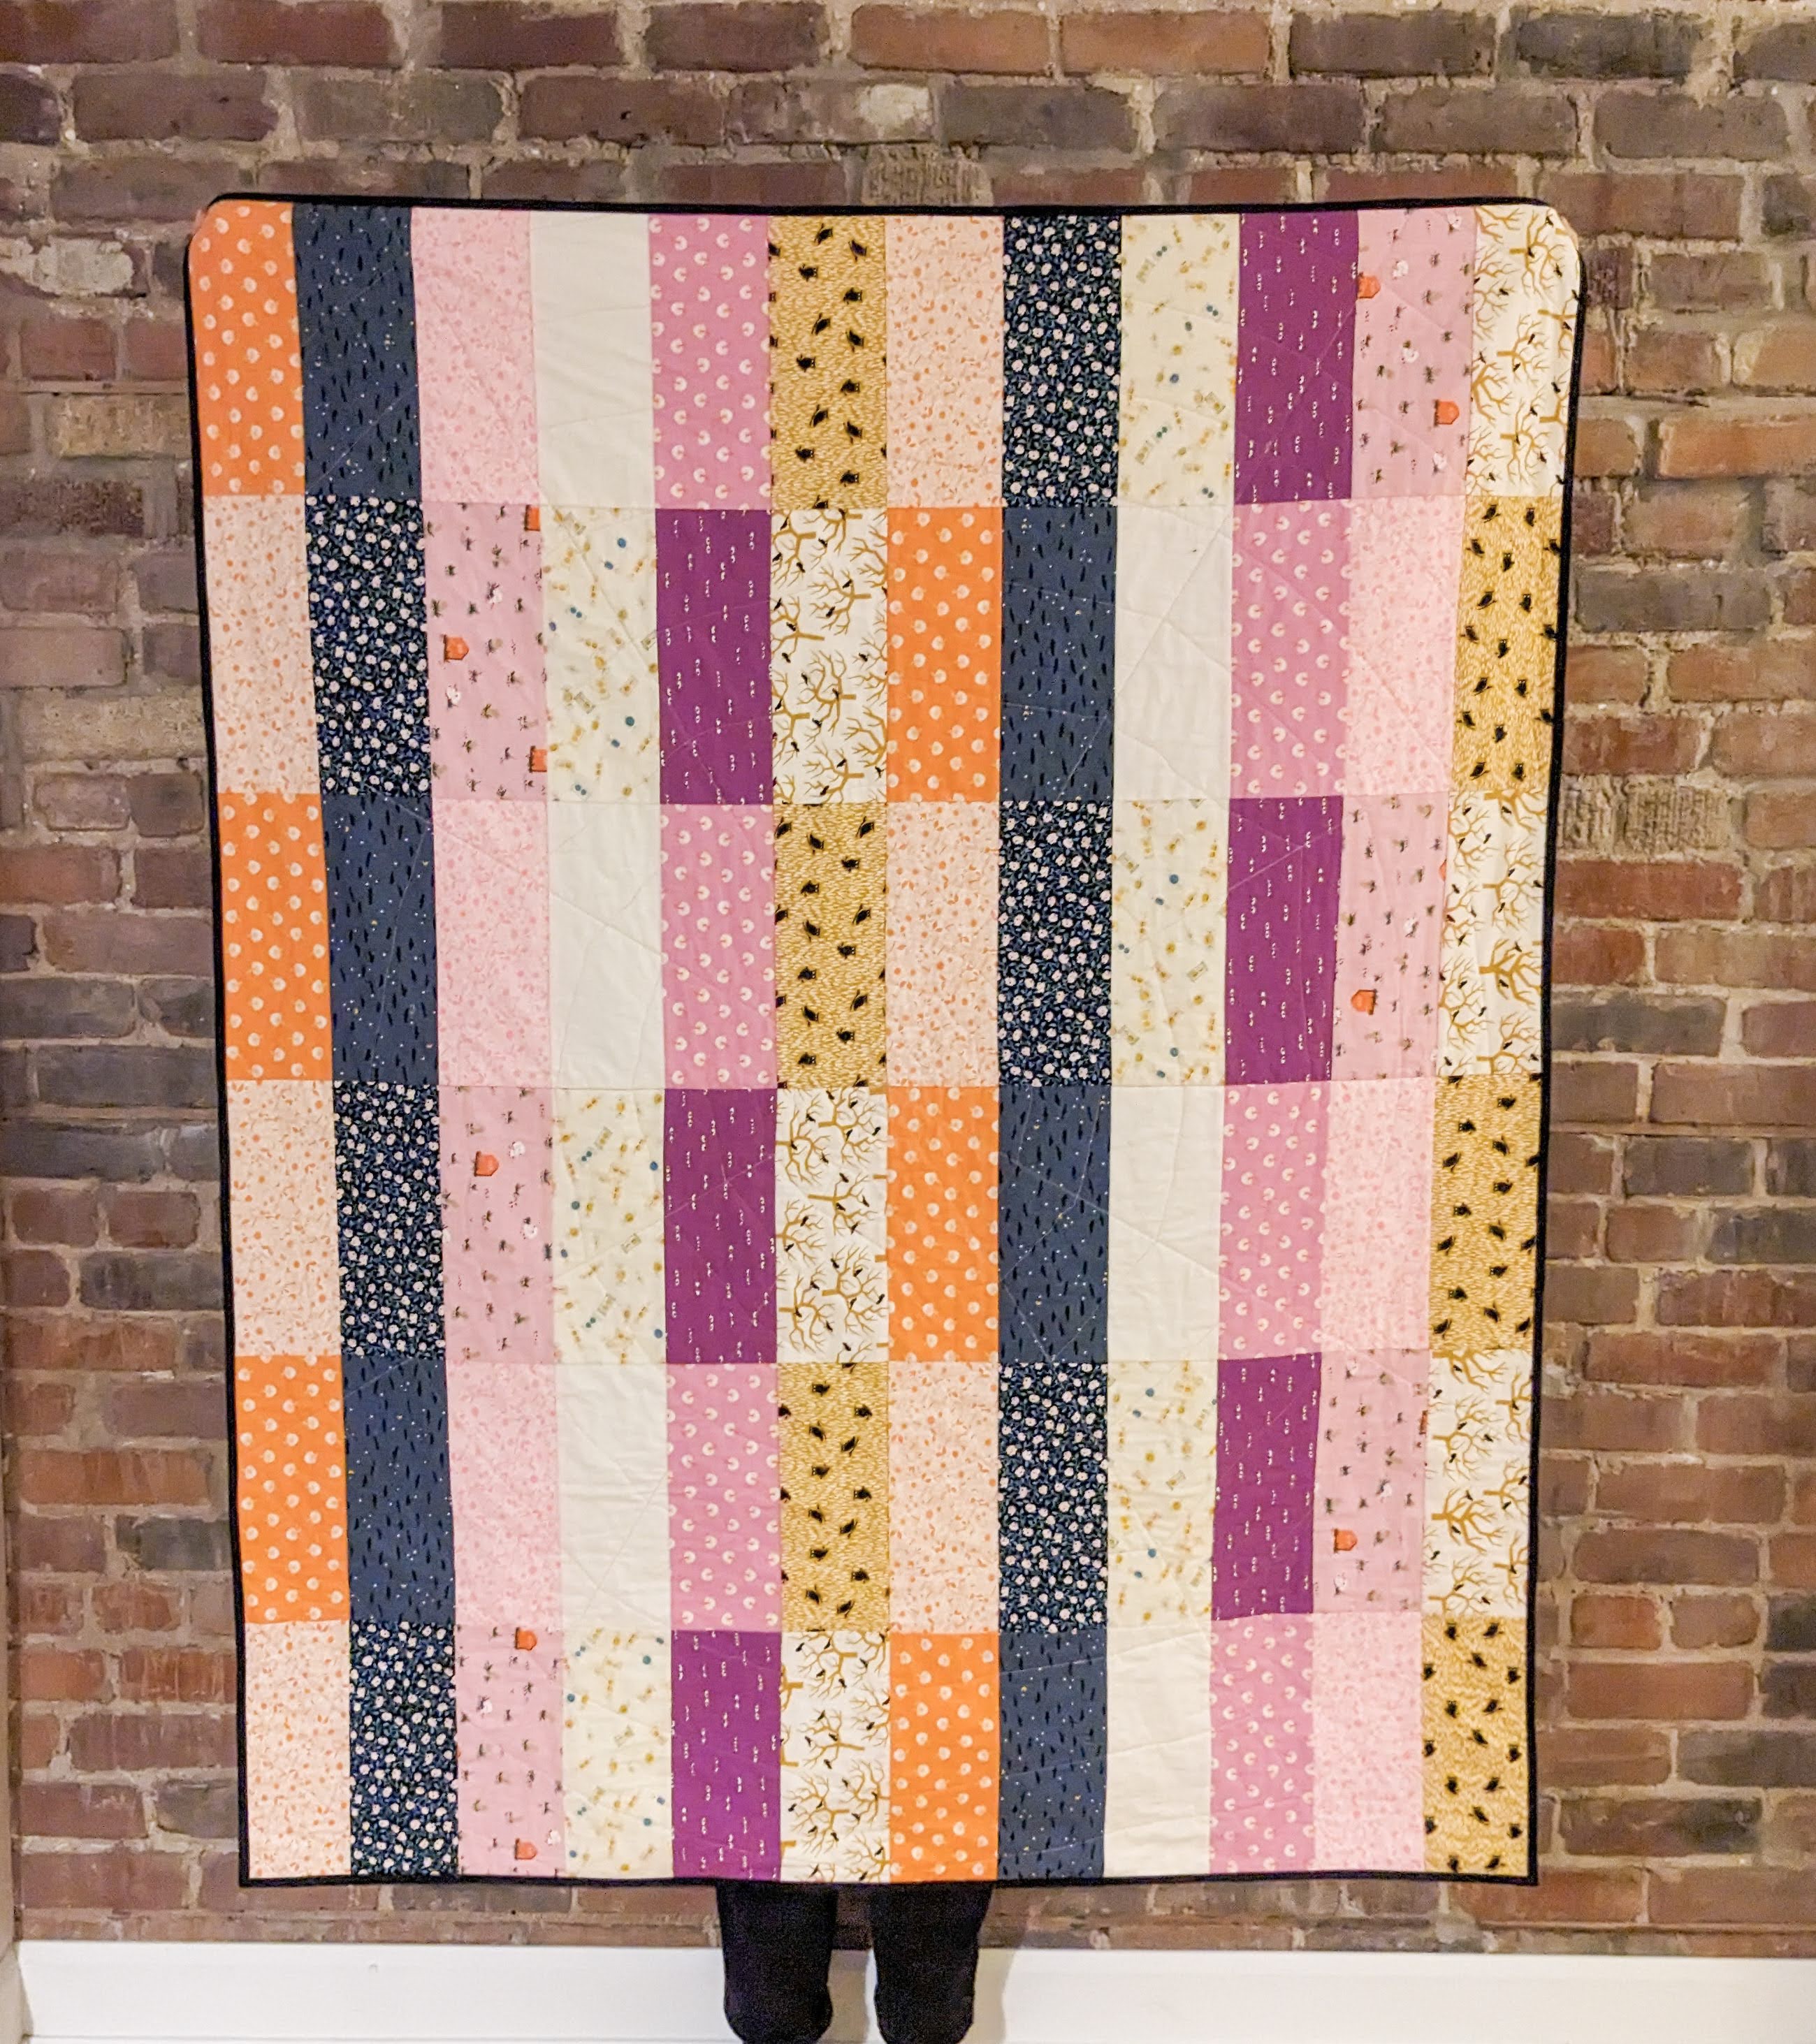
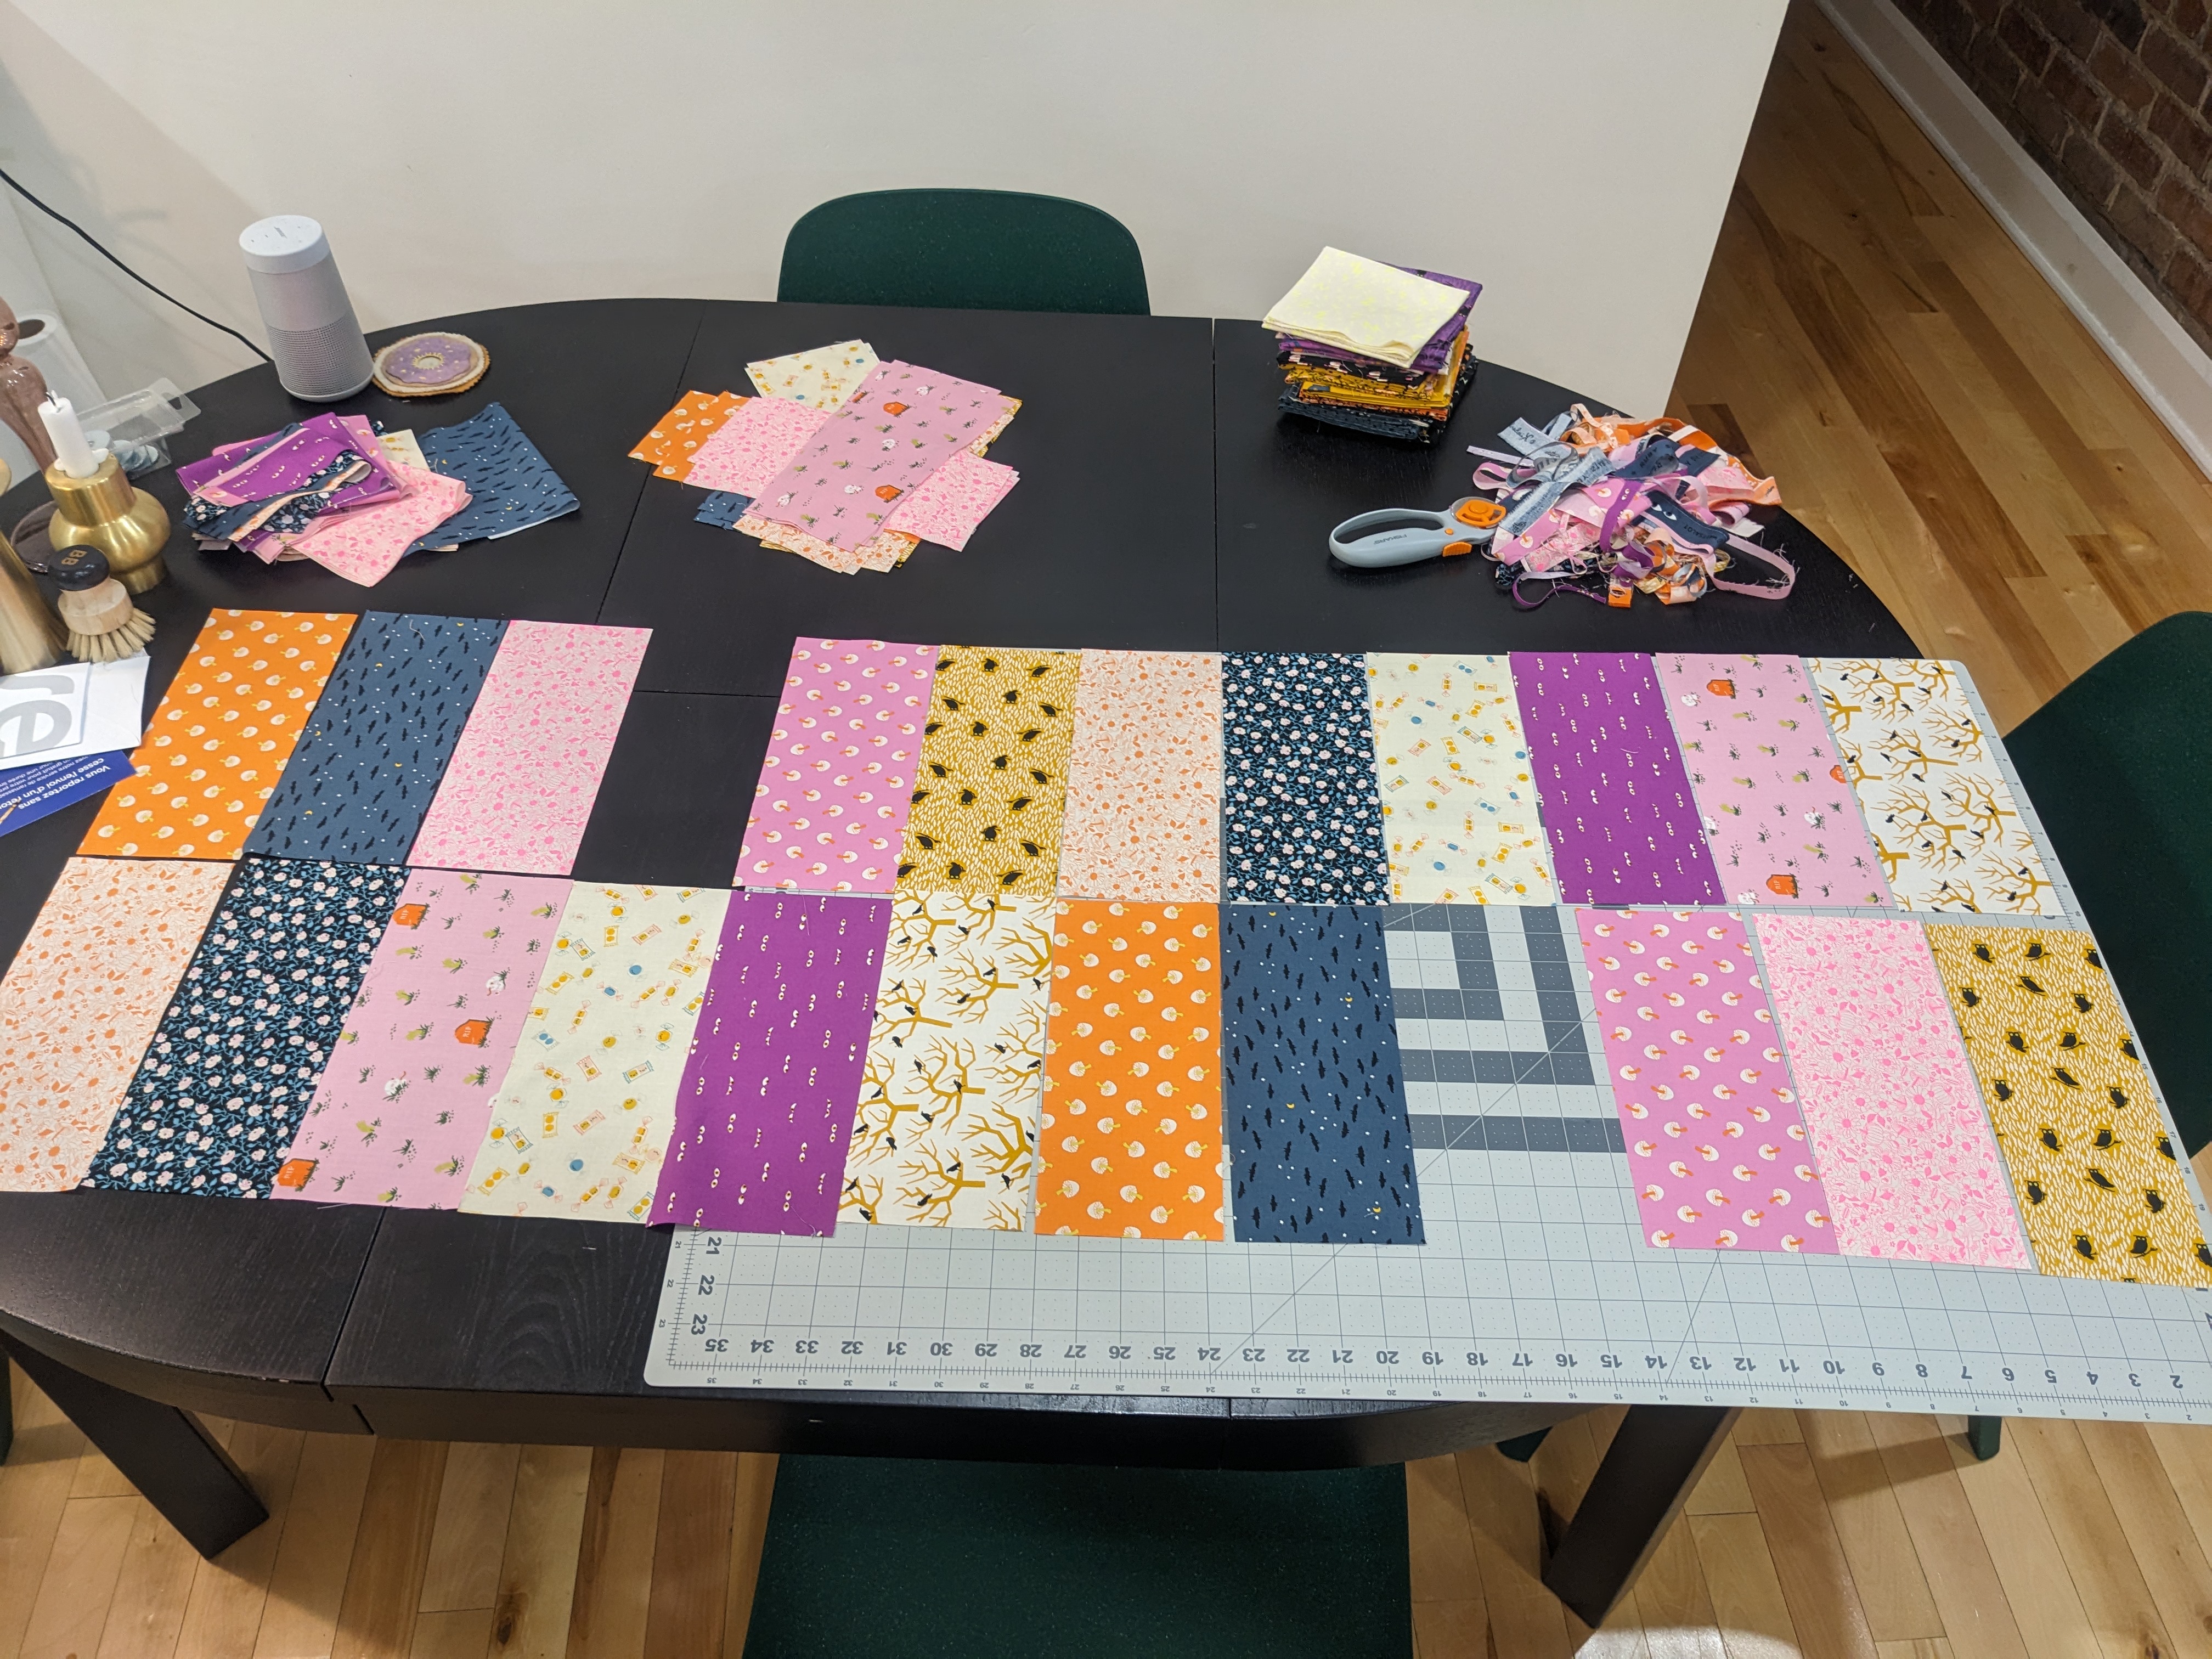
I made my first real actual quilt! Ahh! I finished this one yesterday, and I sewed it up over about 4 days. Add another day or so for cutting out all the patchwork pieces.
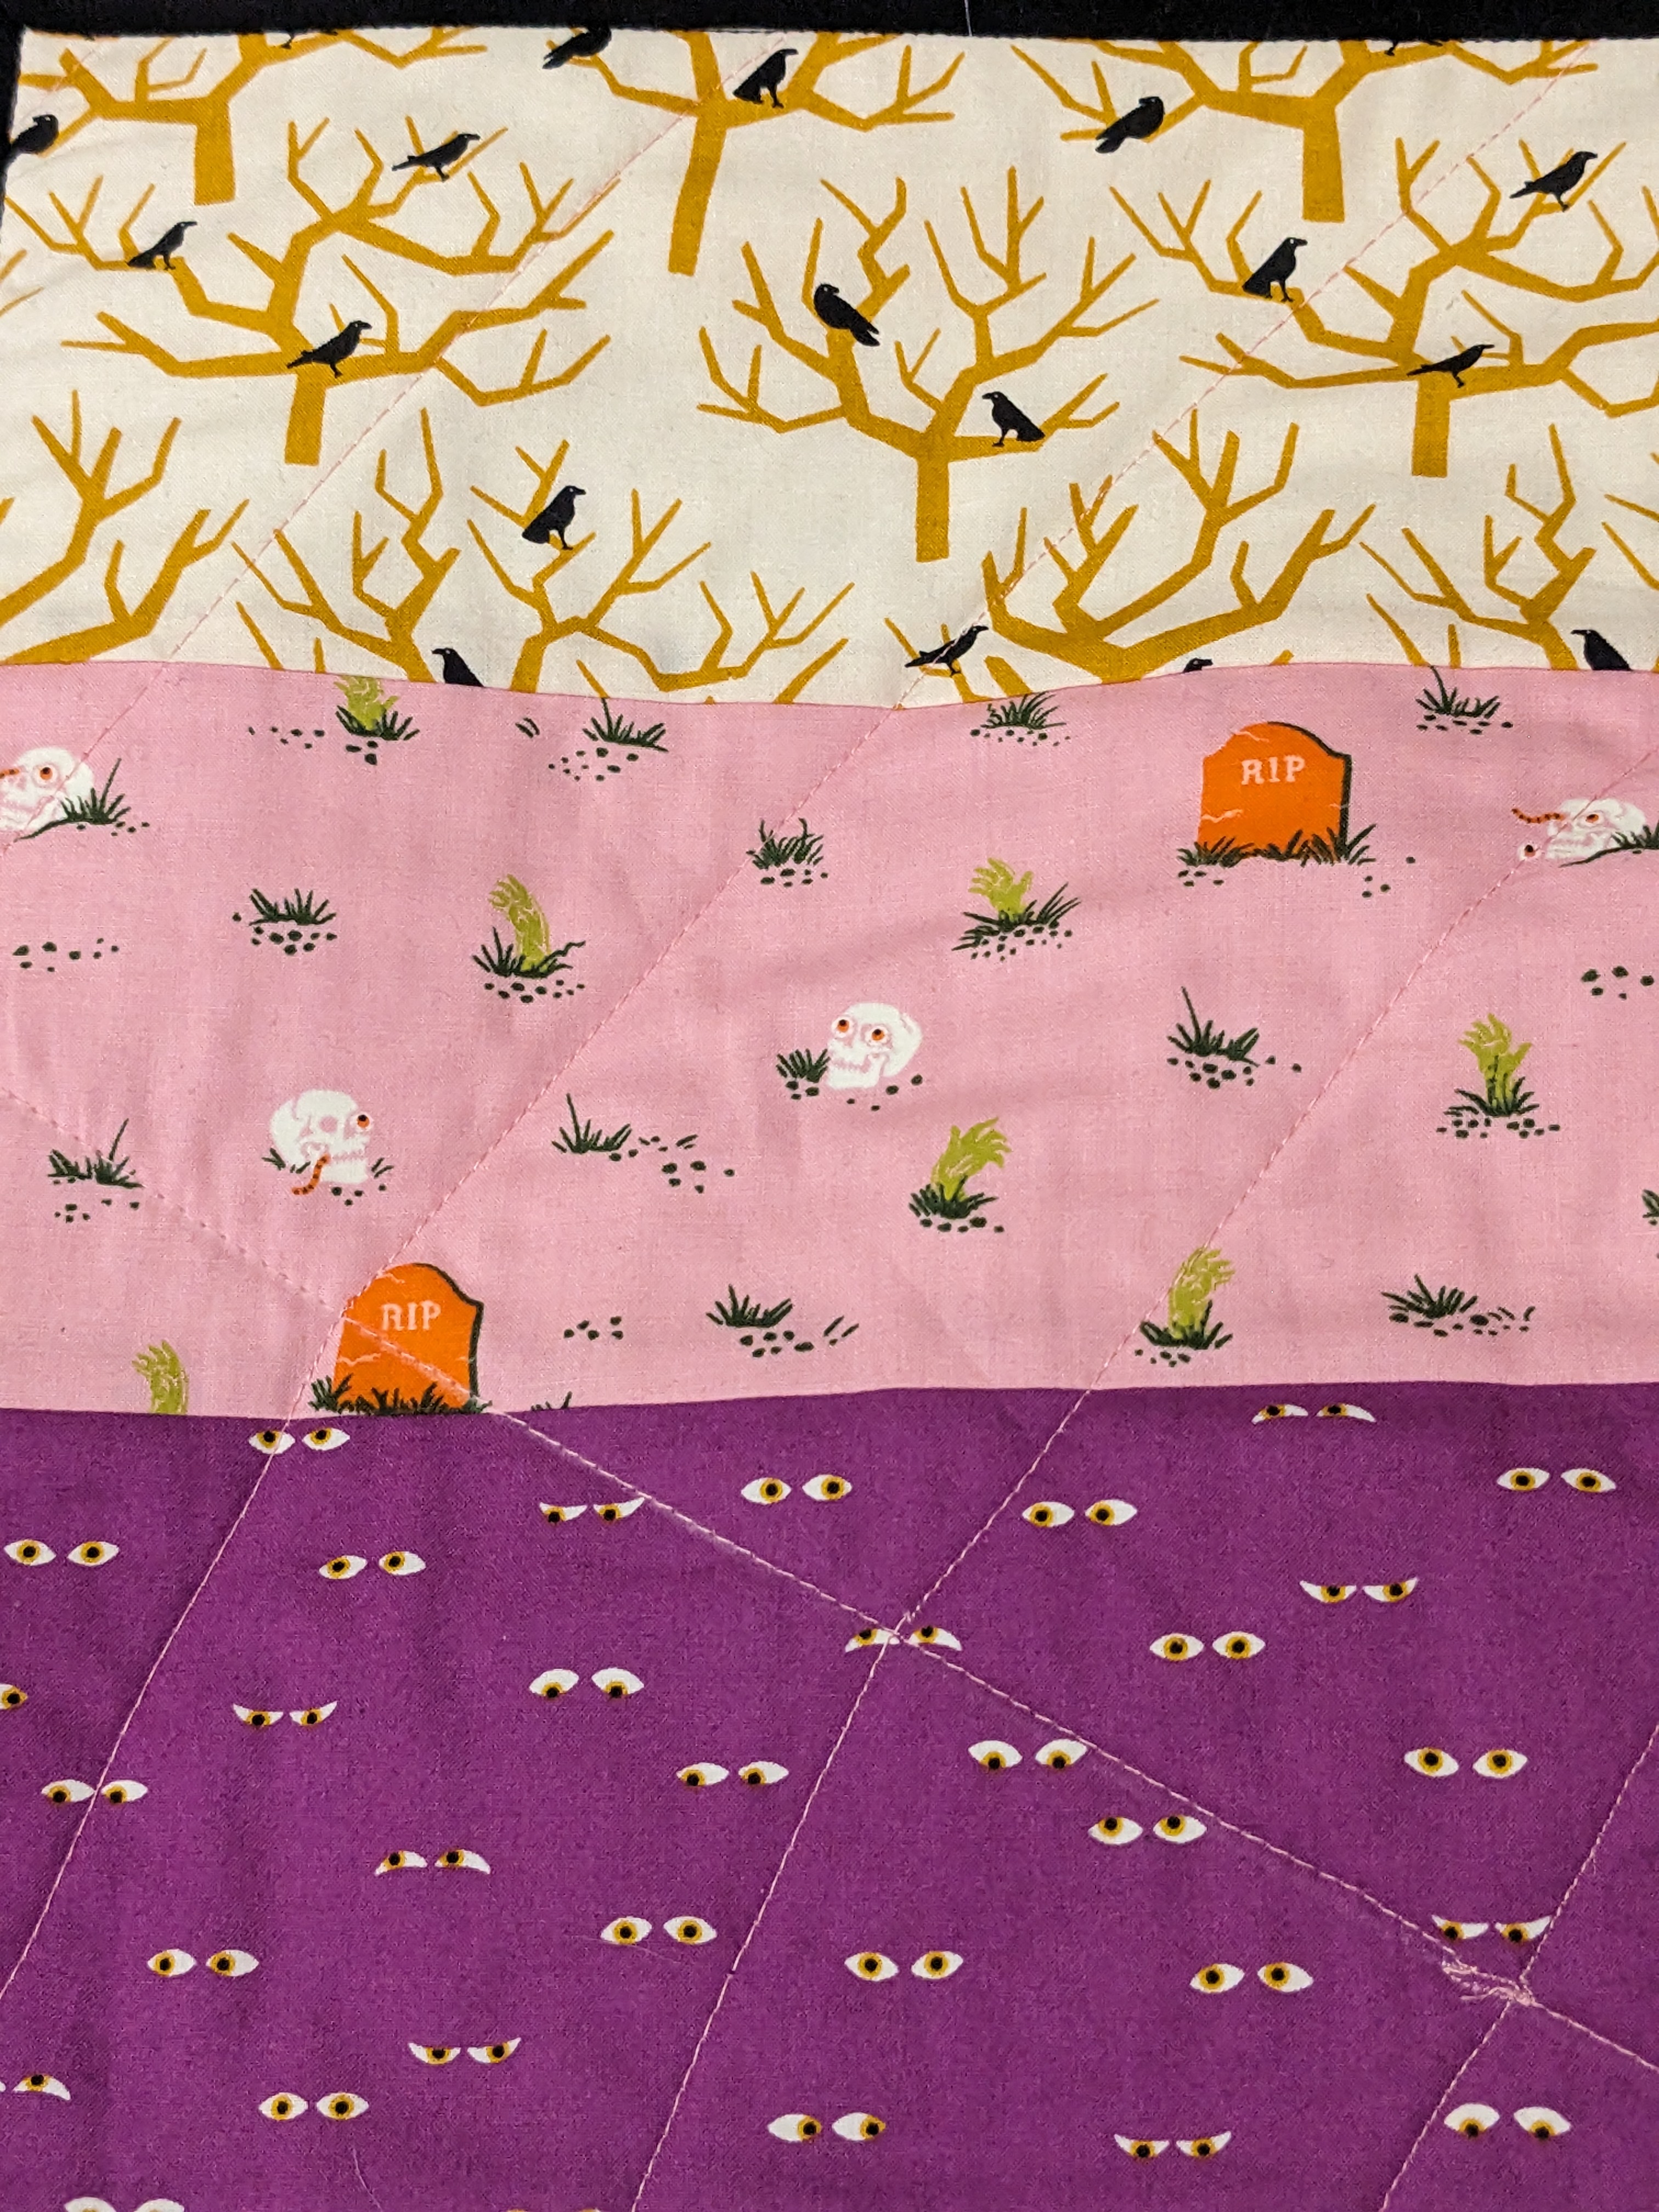
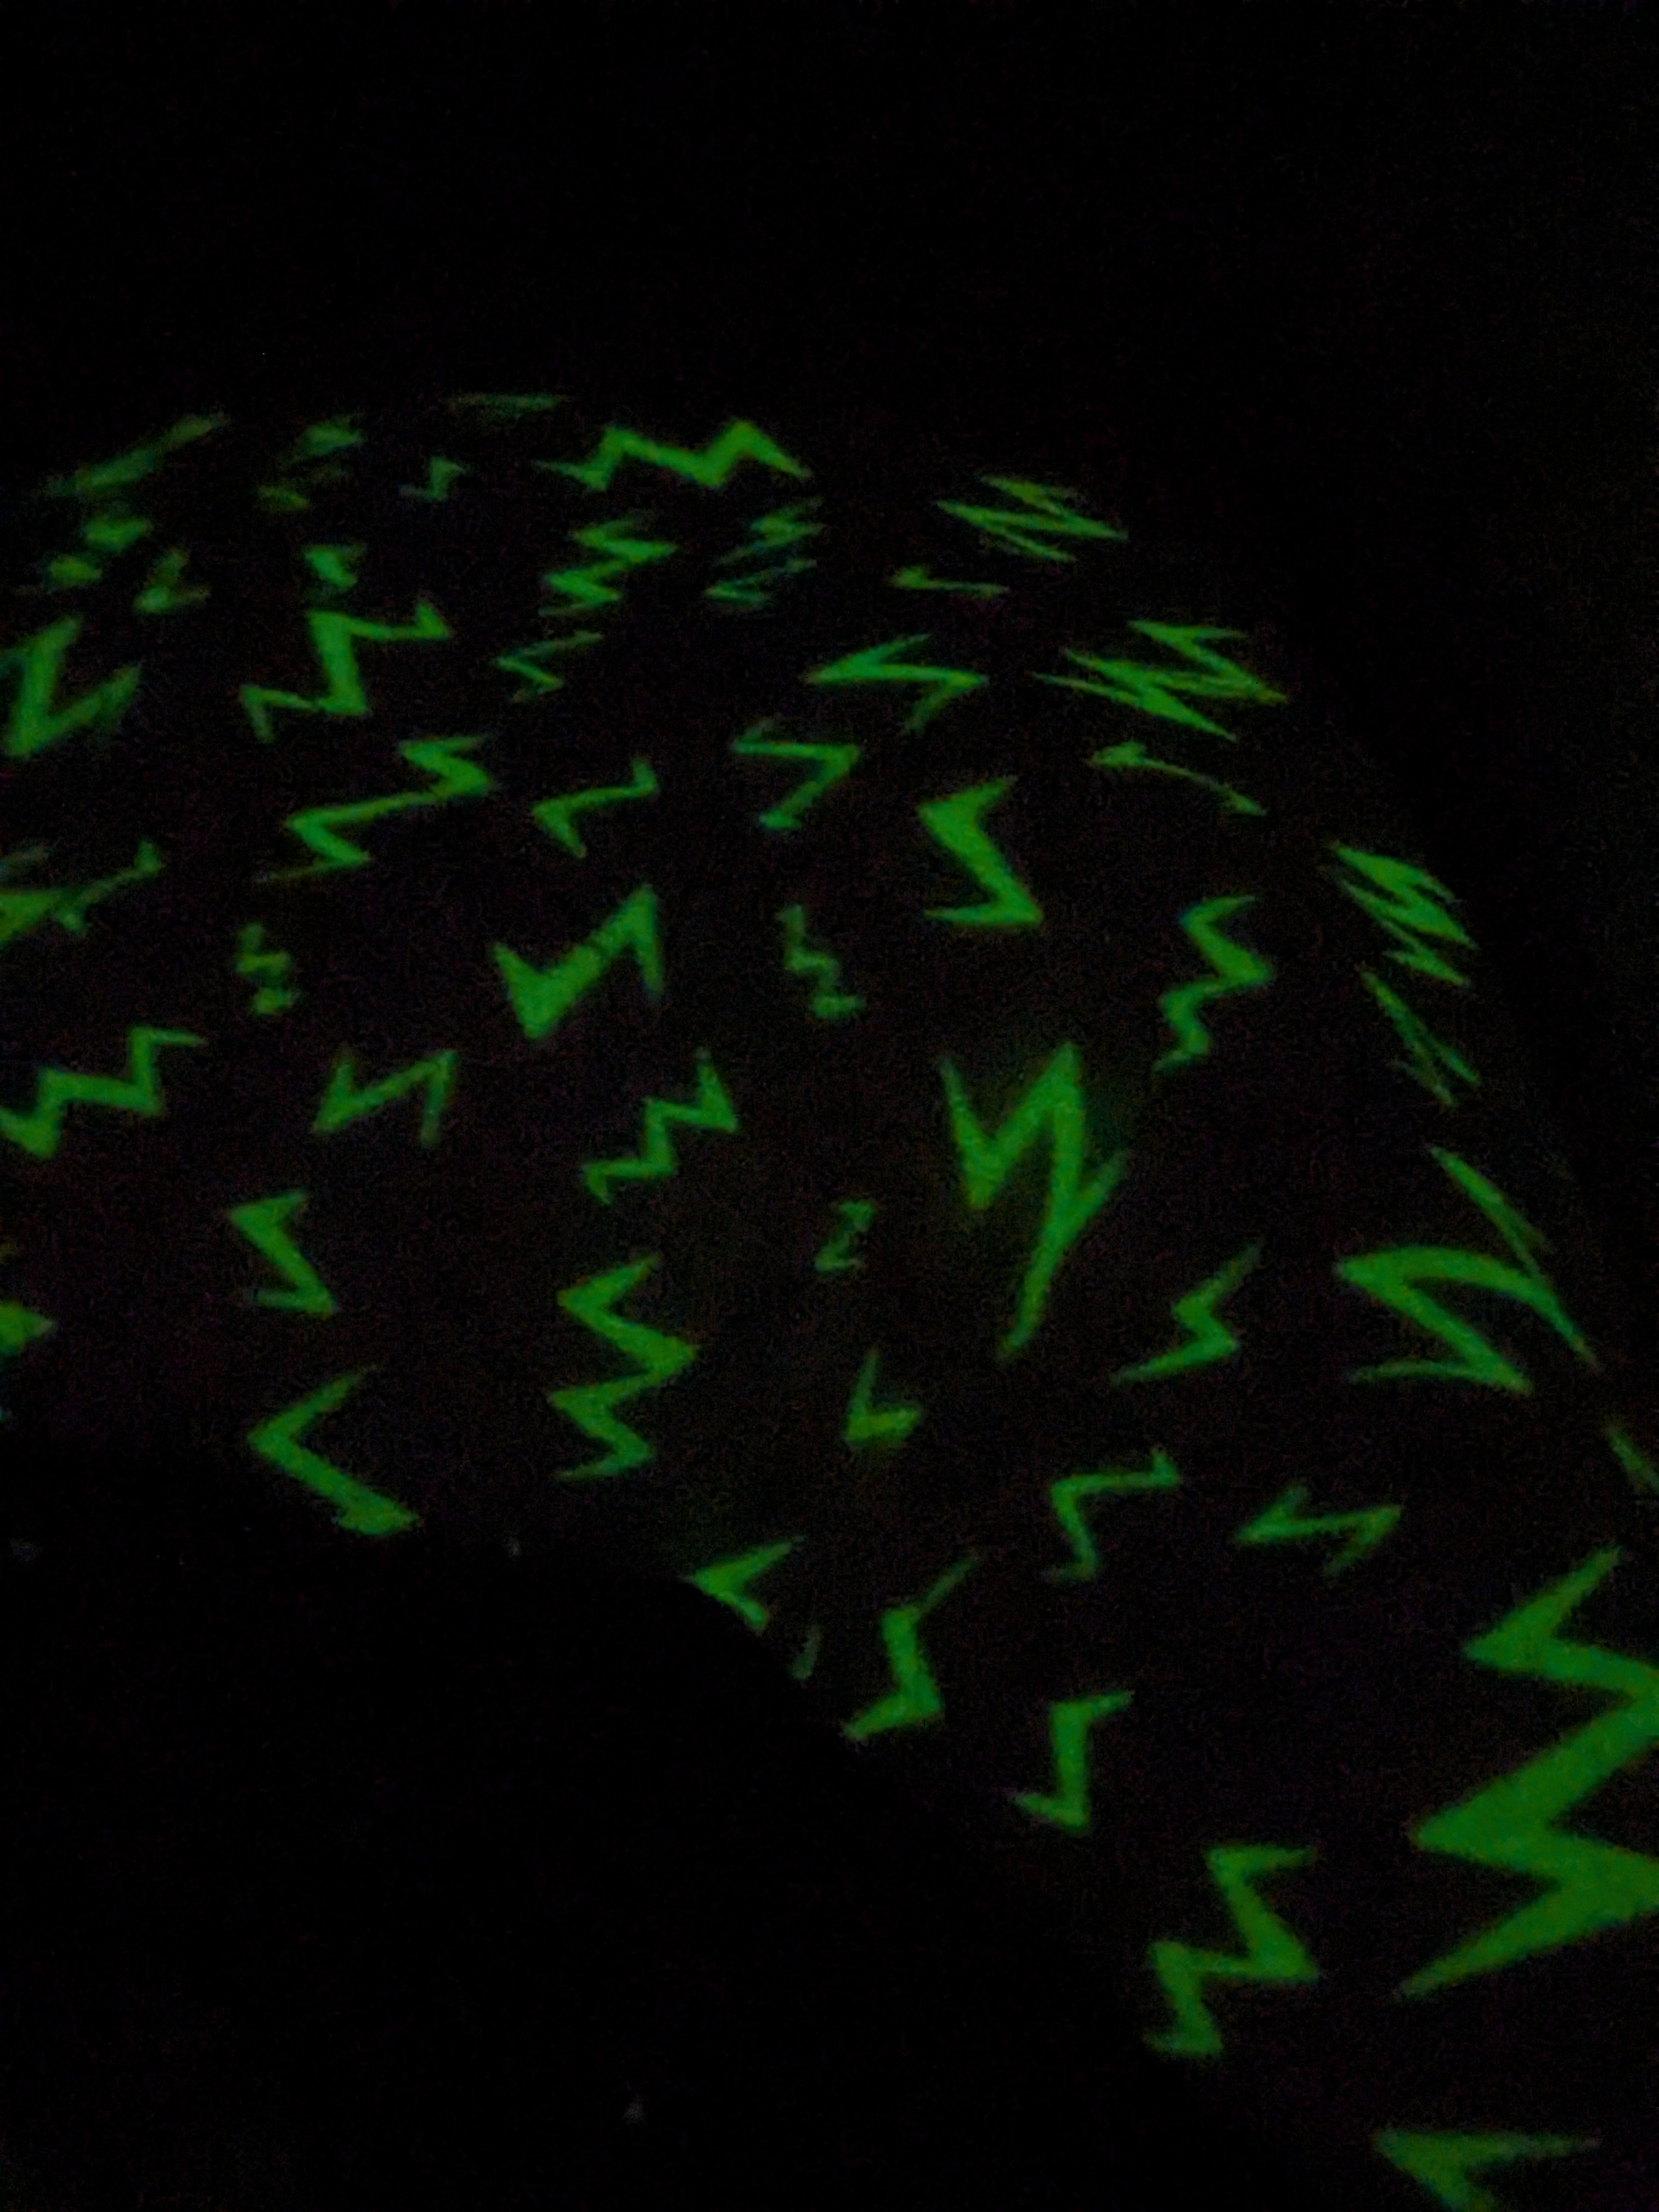
This was also my first time trying to come up with a good layout for all the colours. I'll admit the quilt definitely came out more white dominant than I think is my preference, and that's likely due to the fact that I hadn't cut out the white (secretly glow-in-the-dark lightning bolts) fabric yet, and just assumed it'd look great there.
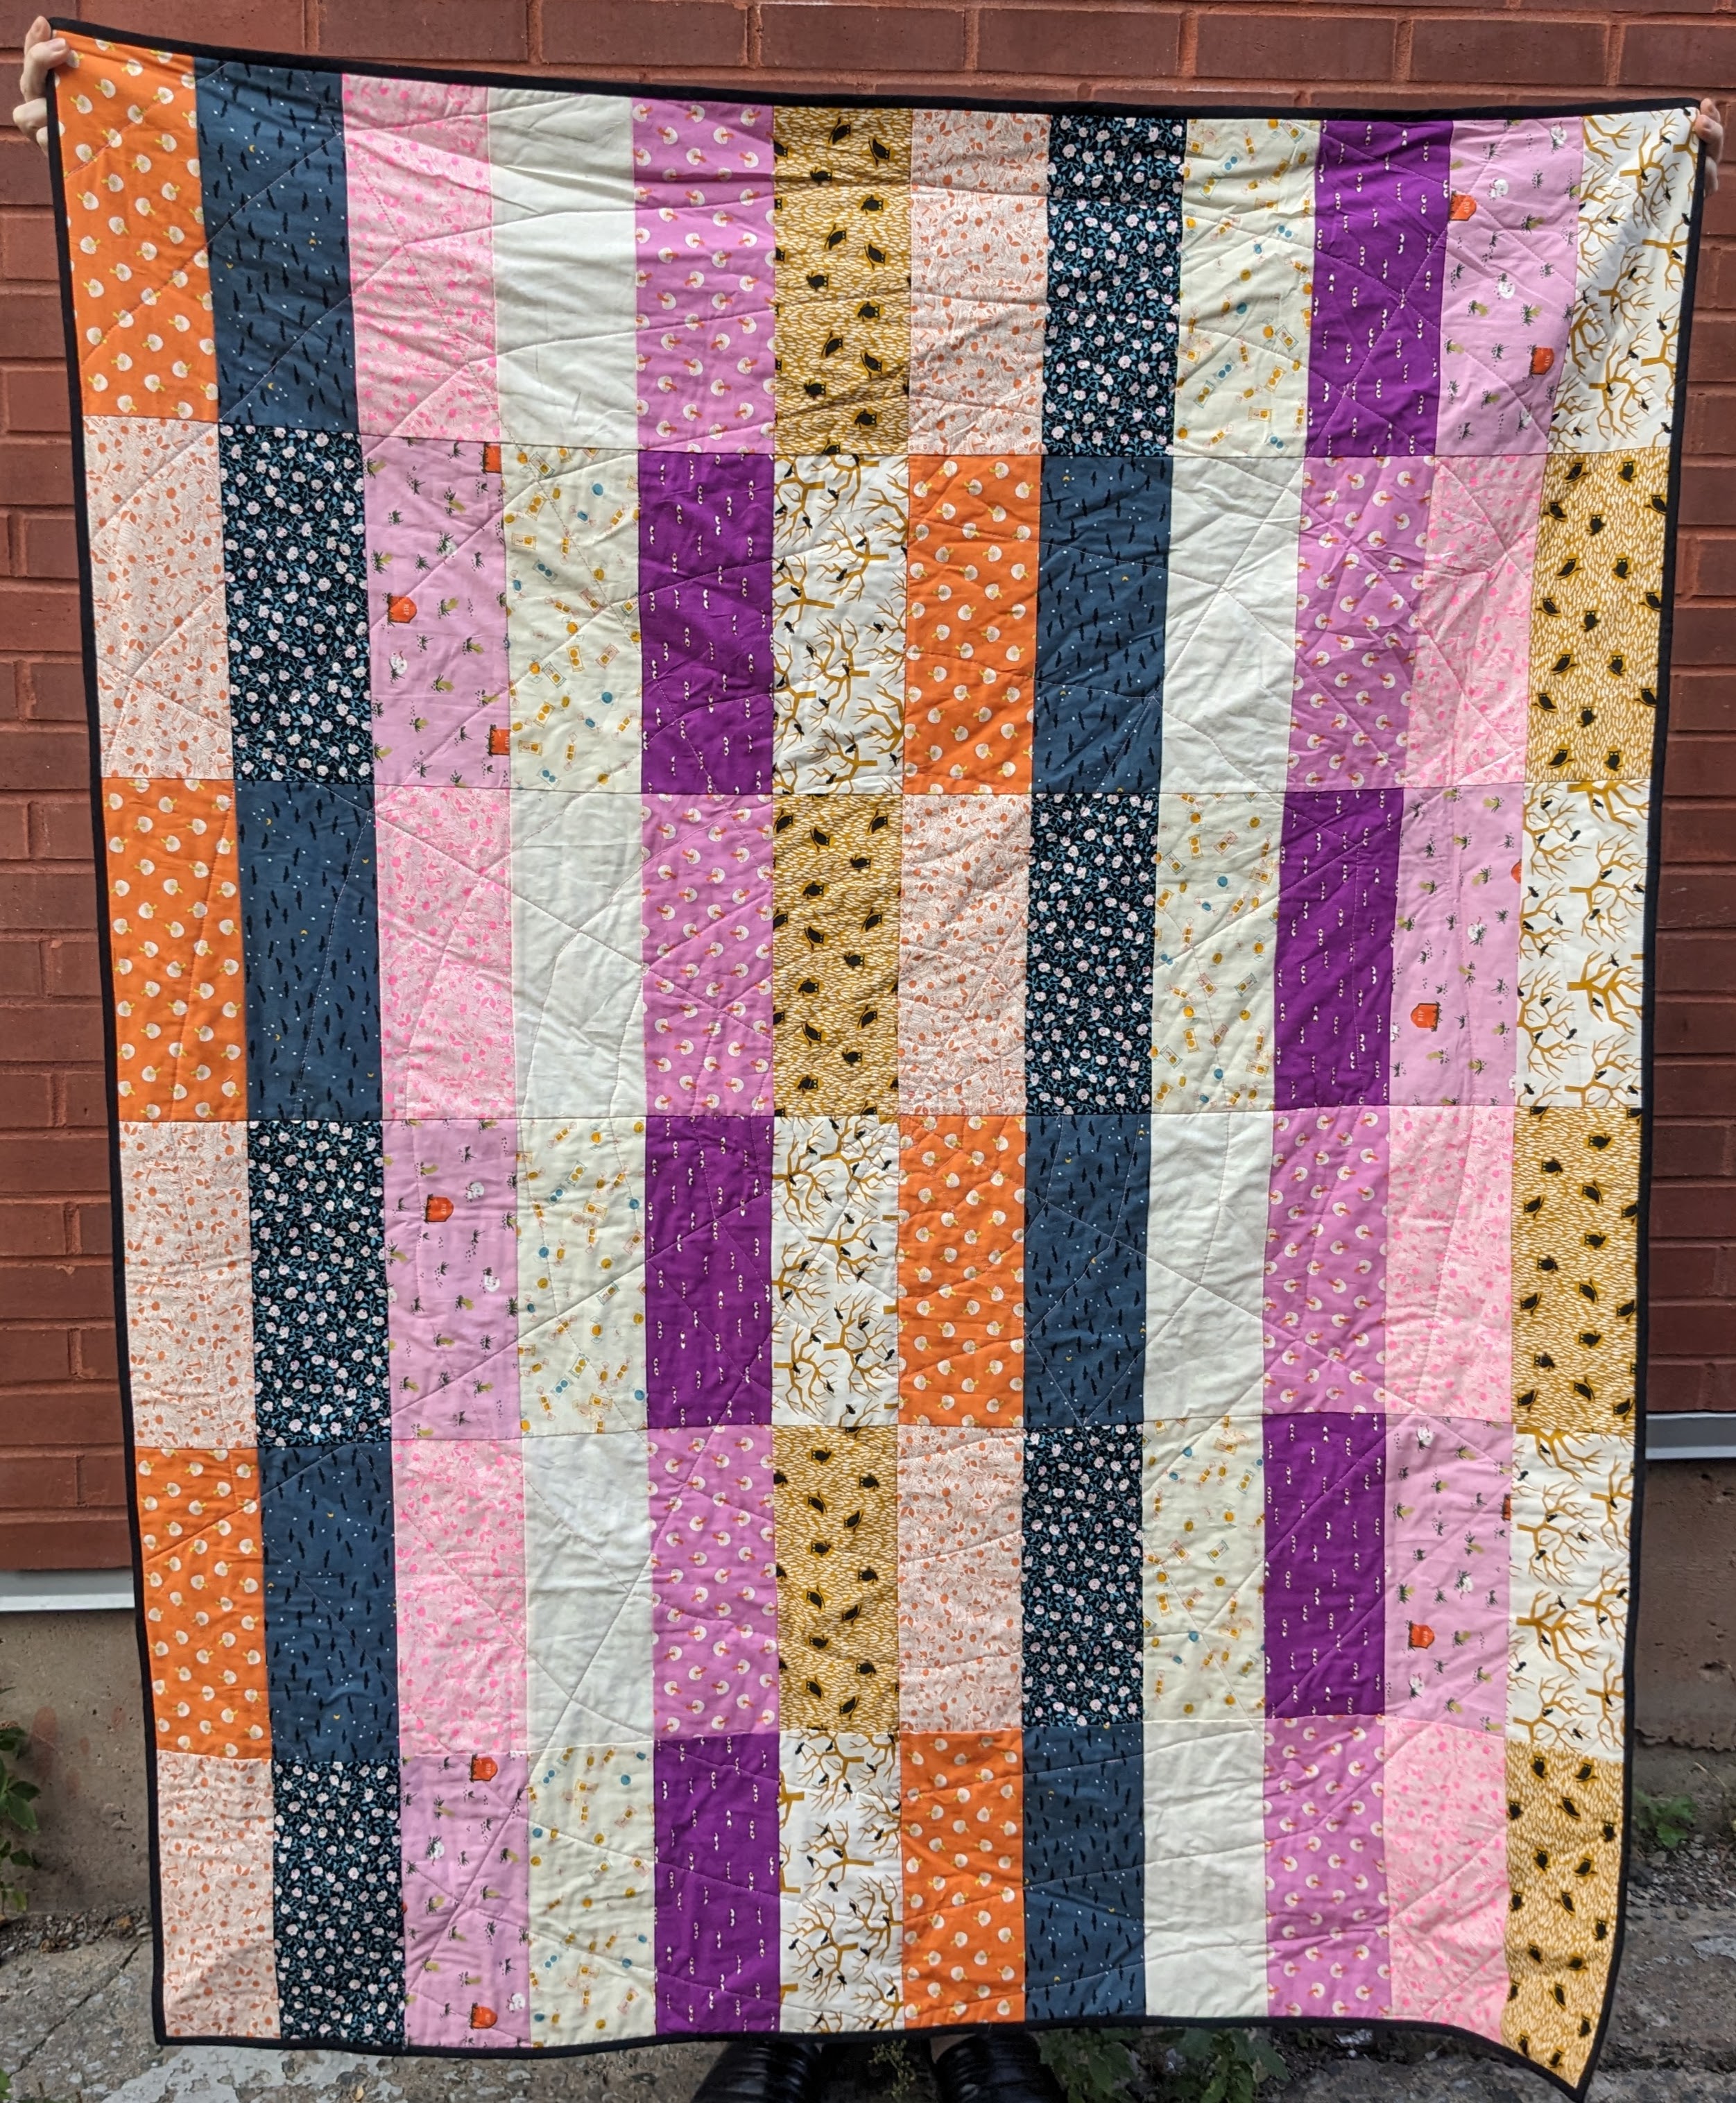
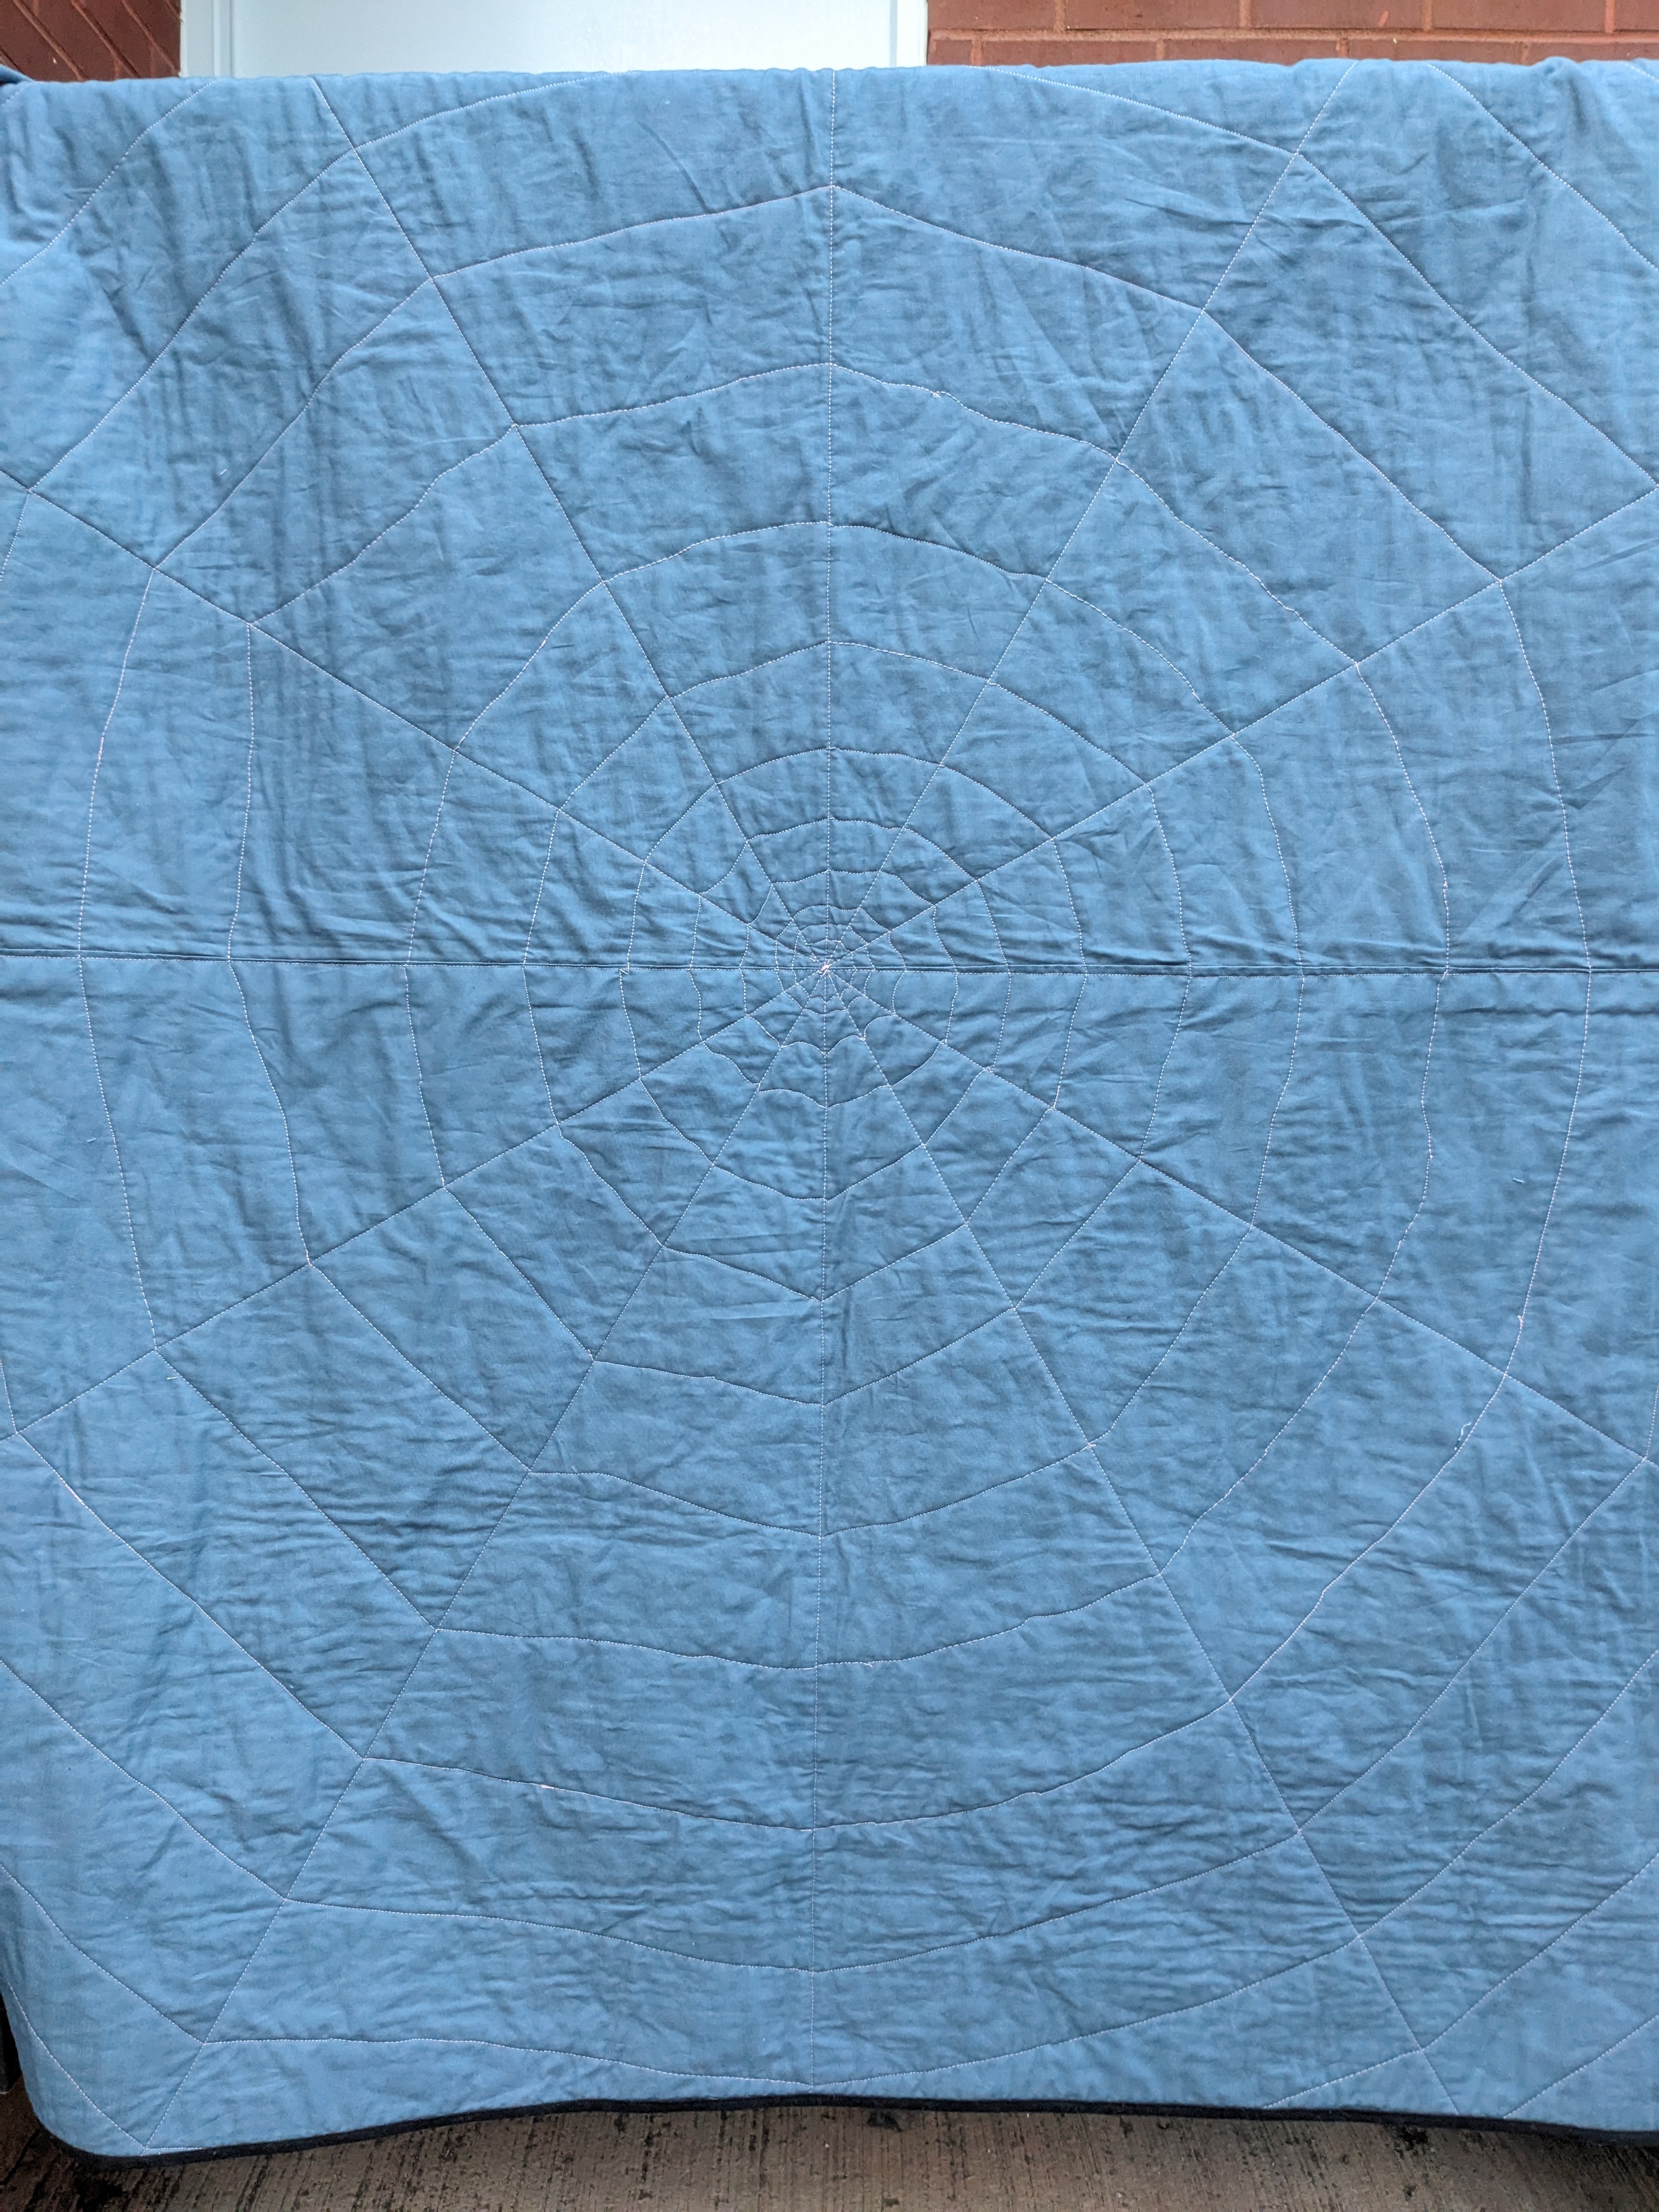
Photographing quilts is hard, hah. This photo is outdoors after I had used the quilt for a tv watching session last night, so please excuse the wrinkles.
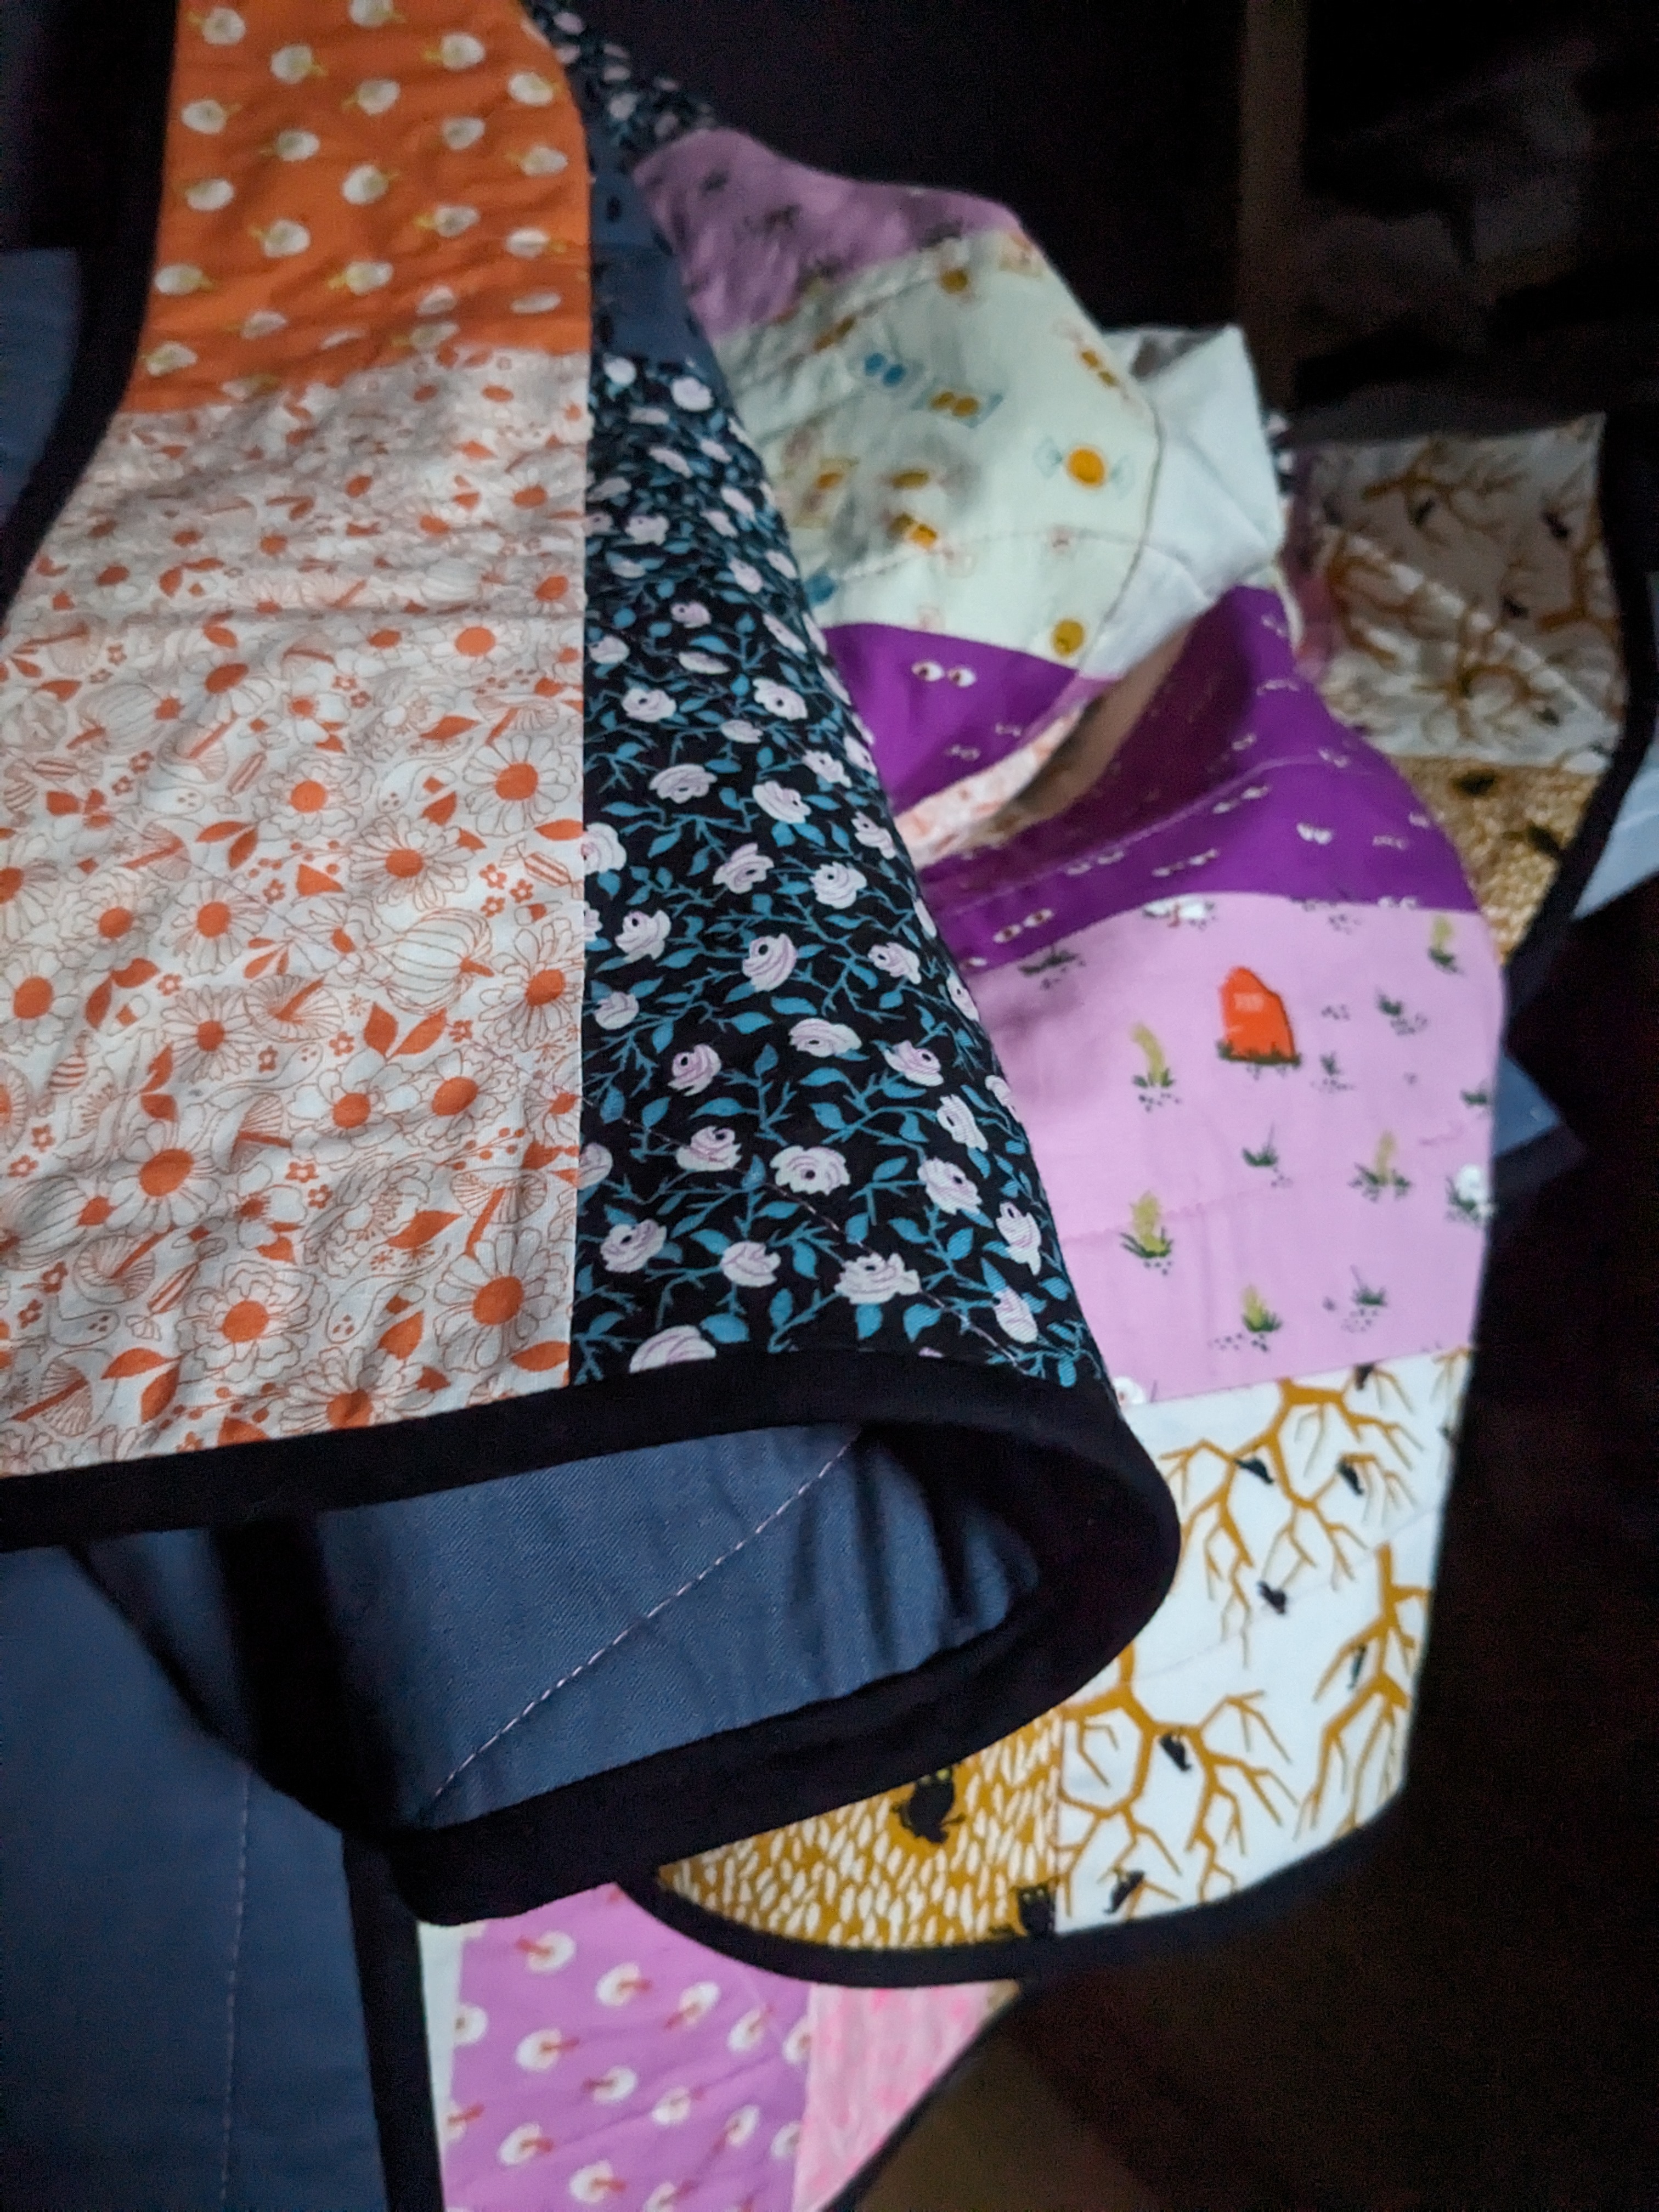
I used Ruby Star Society's pattern "Swatch Quilt" (although it's meant for different fabric, and the pattern was basically just "cut out rectangles and then make a quilt with them"), and used Ruby Star Society's Tiny Frights fabrics. My last post was using these fabrics too, and I just love them. Spooky but cute.
I couldn't decide how to do the actual quilting - at first I was leaning on just doing straight lines, or a grid to keep things simple. But then in my instagram scrolling I saw someone was advertising their long arm quilting service to do a spiderweb on your quilts. I just knew I had to try it. I drew on some chalk lines for the spokes and sewed those in a straight line, but then for the webbing itself I did my first ever free-hand quilting. There are a bunch of mistakes, but I figured because it's a spiderweb, it just makes it look more spooky. I didn't expect for it to come out looking professional on my first try, and this pattern allowed mistakes to fit the theme. Big win, and I love it.
I just love these fabrics. The cute but not cheesy take on Halloween themes was really well done!
Also, Glow in the Dark. Can't get over it. Also can't get over that I was actually able to photograph glow in the dark. Phone cameras are magic these days.
For the binding, I used the glue method - so instead of pinning everything down and hoping it lines up, I used Elmer's school glue to glue down the edges, set it with an iron, and then sewed everything down by stitching in the ditch on the front side of the quilt. It's easily the best binding I've ever done (although not perfect). I'm definitely going to use this method in the future.